How to Record Screen Using CapCut: A Powerful But Simple Tool for Stunning Results
Have you ever seen a tutorial video and thought, I want to make videos like that! Or may be you are a gamer who wants to show your friends an amazing game play and strategies to be used for gaming but you do not know how to do it. If this is so, then screen recording is the answer and it is easier than you think with CapCut.
Screen recording used to learn complicated software that stifled your creativity but not anymore. CapCut offers free, user-friendly tools that not only record your screen but also edit the videos more effortlessly. Even if this is your first time creating content then don’t worry. This blog “How to Record Screen Using CapCut” will guide you through the process from start to finish. We will also share some tips on how to make your videos more stylish and engaging.
Let’s get started!
What is CapCut?
If you love to edit videos on your phone and you probably already know about CapCut. It is an app developed by ByteDance (the same company that created TikTok). This app assists you to edit your video content in lots of different ways absolutely free.
But did you know that CapCut also does screen recording? You can use this handy and smart tool to record what’s happening on your phone’s screen and then you can edit the video using CapCut usual features. There are versions of CapCut for iOS, Android, Windows, Mac and a Chrome extension and online editor.
So, today we will show you how to record your phone’s screen with CapCut then edit the video and upload it to TikTok!
Why Use CapCut for Screen Recording?
CapCut’s screen recording feature is perfect for tutorials, gaming videos or capturing a video call with loved ones. It is like having a professional studio in your pocket or browser.
Why Choose CapCut Over Other Screen Recording Software?
Super Easy to Use: CapCut is more than just screen recording software. It is easy to use, even for people who do not know much about technology or app.
All-in-One Magic: You can do everything you need to do with one program: record your screen, edit videos, add text and effects, and more. And best of all, it’s completely free!
Completely Free: CapCut lets you make high-quality recordings without any watermarks or time limits. When you record your screen with CapCut, you will get clear, pro looking stylish videos. This is great if you want to make videos for YouTube, TikTok, or work presentations.
High-Quality Results: It feels amazing when people enjoy something you created– especially if it’s a video they can’t stop watching because it speaks directly to them or teaches them something new! With CapCut, this can be your reality.
You can use it for lots of things: making tutorials; recording gameplay; saving important video calls with family. Why not try it out today?
Step-by-Step Guide: How to Record Screen Using CapCut?
There are several ways to record your screen with CapCut. You can use the online screen recorder and the Chrome extension. And if you are using a mobile device, you can record your screen and then edit the video in CapCut. In this section we will show you how to use all three methods in detail so that you can create amazing videos for your needs.
Method 1: Using CapCut’s Online Screen Recorder
Using CapCut’s online screen recorder, you can easily capture what is going on your computer screen straight from your web browser and there is no need to download any software. Just follow these simple steps:
Step 1: Go to the CapCut Website
Visit the site for CapCut’s online editing tools, then sign up or log in using your Google, Facebook, TikTok or email account.
Step 2: Begin a New Project
To begin screen recording, click “New Project” then choose “Screen Recording” from the options.
Step 3: Configure Your Recording
Decide what kind of recording you want to make:
- Entire Screen: If you need to record everything on your screen i.e.presentations or gameplay.
- Specific Window: Use this option if you only want to capture the activity within one application or document.
- Chrome Tab: Ideal for when you need to create tutorials that show how to use web-based applications or other content that is displayed in your browser.
- Record Microphone: Use this feature to add voice-over narration to your video.
- System Audio: This will capture any audio from the application itself (such as music or dialogue).
Step 4: Start Recording
Once everything is set up, click the “Record” button (red circle) to begin recording. Now you can demonstrate your game playing skills to your friends and audience. Make sure there are no distractions on screen such as open applications or notifications from other programs while you are recording so that there would be a full focus on quality of Content.
Step 5: Stop Recording
Once you have finished recording, hit “Stop Sharing” or “Done” to end the session. Your recording will then appear on the CapCut editing page.
Step 6: Edit Your Recording
Afterward, you can trim the clip, add text, effects and music. It is somewhat (decorating a cake) making it look better than ever before.
Step 7: Export and Share
You can export your videos in MP4 or MOV formats with resolution of 1080P to 4K. Moreover, the app facilitate the content creator to upload their videos directly to Social Media. Further, you can also save the video at your cloud storage or Hard disk for Pro level edits and use.
Advantages / Benefits of Using the Online Recorder
- It can be used from any location, and it doesn’t need any setup on a computer.
- Recordings can be edited with CapCut without any problems.
- There is no cost for the first hour of video recording and there will not be any watermark on the video.
Method 2: Using CapCut’s Chrome Extension
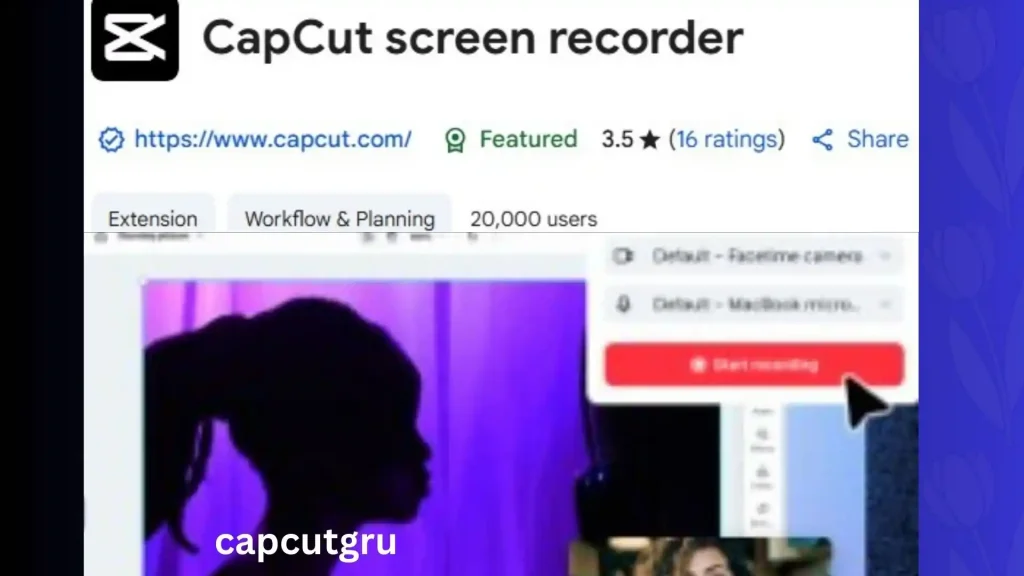
If you are a Chrome user and want to record your screen then you can use the CapCut screen recorder extension. It is a simple way to do it. Here is how you can use it:
Step 1: Install the Extension
Go to the Chrome Web Store and install the CapCut Screen Recorder extension.
Step 2: Launch the Recorder
Once installed, click on the CapCut icon in the top right corner of your browser to open the recorder.
Step 3: Choose the Recording Area
Select what you want to record with these options:
- Entire Screen: Records everything on your desktop.
- Browser Tab: Records a specific browser tab.
- Specific Window: Records one application or document window.
Don’t forget to turn on your microphone or system audio if you want sound in your video.
Step 4: Commence Recording
Once you have made all the selections, click the share button to start recording your screen.
Step 5: End Recording
You can stop the recording at any time by clicking on stop sharing. Your screen recorded video will be automatically uploaded to CapCut’s cloud storage.
Step 6: Edit in CapCut
Go to your recording in CapCut’s online editor. Add some cool effects, text and transitions. You can also add subtitles.
Step 7: Download or Share
After editing into and outro, download or directly share your video on social media platforms.
Advantage of Chrome Extension:
- One click away in your browser.
- Record and edit videos easily.
- Free cloud storage to save your videos.
Method 3: Screen Recording on Mobile Devices and Editing in CapCut
Although the mobile application of CapCut does not have any screen recording function, users can easily record the screen by utilizing their device’s built in screen recording capabilities and then they proceed to cut or edit it within CapCut. To do this please follow the instructions:
iOS Users
Activate Screen Recording: To add Screen Recording to the Control Center, go to Settings then Control Center afterward Customize Controls, then tap the plus (+) sign next to Screen Recording.
Begin Recording: You can navigate downward from the top-right corner (or up from bottom on older models) to open the Control Center. Press & hold Record button to turn microphone on. Tap Start Recording.
End Recording: You will see a red bar at the top; just tap it and select Stop. The recorded clip will automatically be saved to Photos.
Transfer to CapCut: Launch CapCut then tap on New Project and choose the recorded clip from Photos.
Edit Your Video: You can trim, cut, apply filters, add text & music and do many more things to make your videos up to the mark.
Export & Share: After editing your videos, you may either save it or share directly through social media platforms.
For Android Users
Access Screen Recorder: Open up the quick setting panel then tap the screen recorder icon. If you do not see the Screen Recorder icon then you have to enable it from your device setting.
Start Recording: When you launch the screen recorder it will prompt you to select an audio source. You have the option to record the sound using microphone, system audio or both. Once you have done, tap on Start Recording.
Stop Recording: If you want to stop screen recording, pull down the notification bar. There you will see an option that says “Stop Recording.” Tap on it and your video will be saved to the gallery of your device.
Import to CapCut: If you want to edit your screen recording, you can use the app CapCut.
Edit and Share: Open CapCut, create a new project, and select your screen recording from your gallery. You can now edit your screen recording using the tools in CapCut.
Tips for Mobile Screen Recording:
- Clean Your Screen: Shut any apps that you do not need, so that you are not distracted.
- Use Do Not Disturb: When you are recording and do not want notifications to interrupt you then you must enable “Do Not Disturb” mode.
- Check Storage: You must check the storage space in your device for uninterrupted recording.
Info Table : Comparision
| Method | Platform | Key Features | Best For |
| Online Screen Recorder | Browser (any device) | Free, no installation, up to 1-hour recording, integrated editing | Quick, browser-based recording |
| Chrome Extension | Chrome Browser | Easy access, cloud storage, seamless editing, up to 1-hour recording | Chrome users, frequent recorders |
| Mobile Device + CapCut | iOS/Android | Uses device’s recorder, powerful editing in CapCut, no recording time limit | Mobile users, flexible editing |
Tips for Better Screen Recordings
If you want your screen recording videos to be professional and engaging, then here are some tips for you.
Plan Ahead:
Know what you want to show before you start. A clear plan keeps your video focused and engaging.
Use Annotations:
To make your video interesting, add arrows, text, shapes or highlights. Viewers will easily understand your points with these extra features.
Check Your Microphone/System Sound:
Test your microphone system sound before you start recording to ensure clear audio. A muffled or low voice can spoil the effect of an otherwise perfect video recording.
Eliminate Potential Distractions:
A clean and professional-looking desktop is essential for an effective video screen recording.
Don’t worry if your first video recording isn’t perfect– just keep trying! Practice makes perfect, and with each attempt you’ll improve.
Expert Opinion
According to Sarah Kim, a digital media expert who has been working in the field for more than eight years, “The integration of screen recording with video editing on CapCut would truly be a game-changer.” She further explained that this new feature will allow users to “create professional-grade content with ease” and that it will “streamline the creative process for both beginners and pros alike.”
Conclusion
The screen recording feature of CapCut is an amazing tool that helps you in expressing your passion and knowledge in a very creative way. Whether you are using the online editor or chrome extension or the mobile app you can easily record your screen with a few clicks.
You only need to download CapCut, tap the record button and start telling your story through the screen recording videos. Do not keep your creativity on hold; inspire your viewers by sharing some amazing videos created by you using CapCut’s screen recording feature.

