How to Remove Image Background in CapCut
CapCut is an extensively accepted app for editing images and videos among the global creators that can be accessed on Android, iOS, Windows, and online operating systems; it has gained popularity due to its user-friendly and intelligent design. Among other things, there is a feature in which one can easily remove the background so that you do not have to see some distractive elements within your pictures as part of the package.
By following this manual, you will learn some tricks for using the instrument and be provided with creative motivation.
Why Remove Backgrounds?
Your pictures can be distinct with the elimination of backgrounds. It aids in giving all the attention to the subject matter at hand such as individuals and products. Again, you may opt to change the background for various effects – official or otherwise.
How to Remove Image Background in CapCut: Step-by-Step Guide
There are two methods mainly used for image or video background removal. These methods are given as under:
First Method
For Images
Start a New Project:
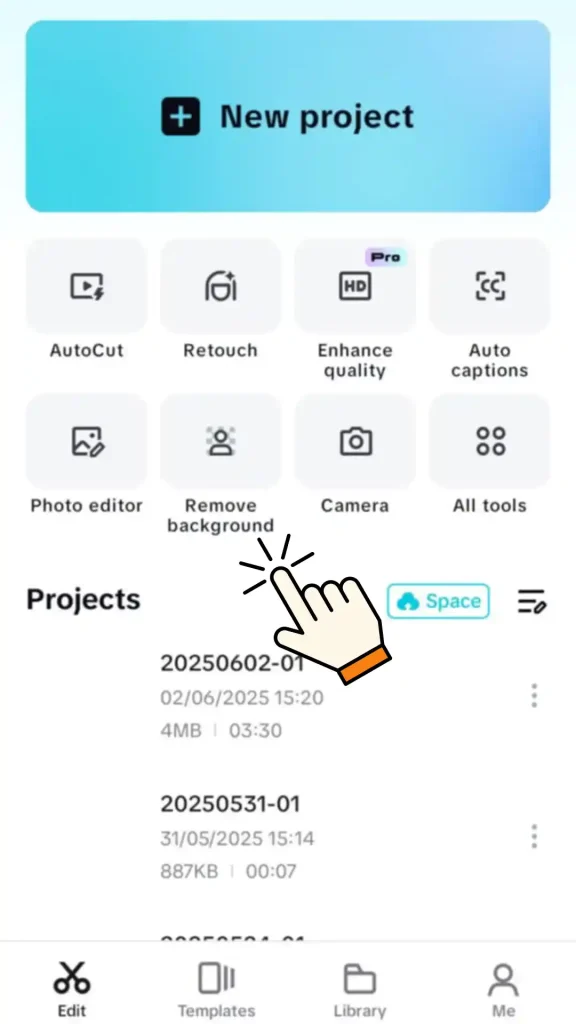
You can begin by opening CapCut in your phone either official or MOD Version or computer and starting a new project by clicking on “New Project.” After that, choose the image you want from your gallery.
Remove the Background:
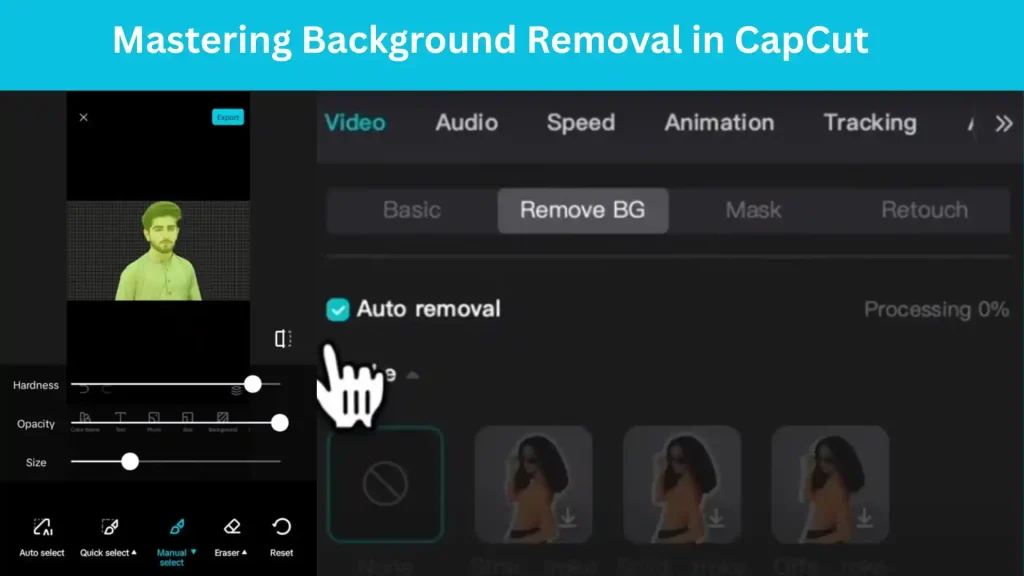
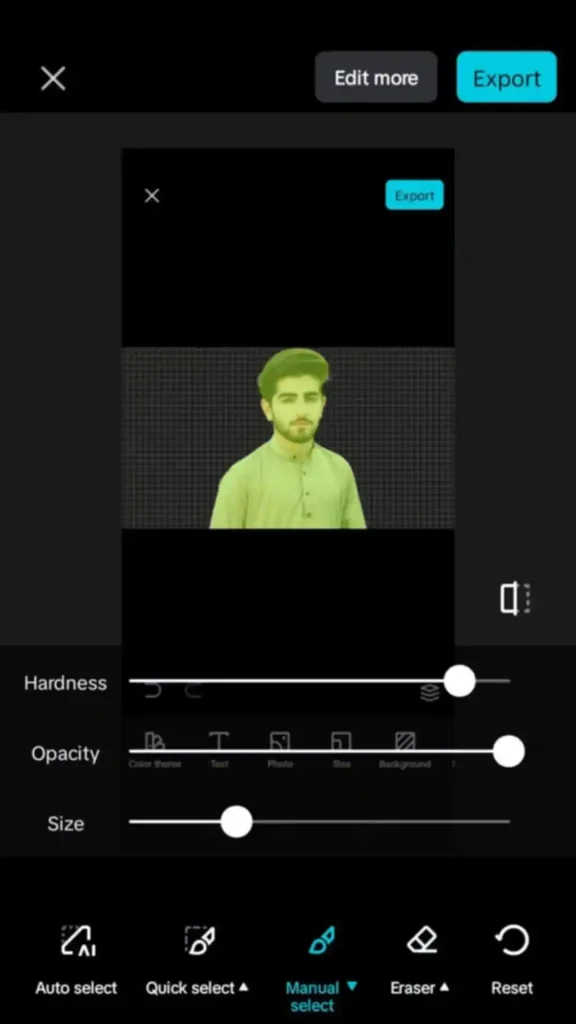
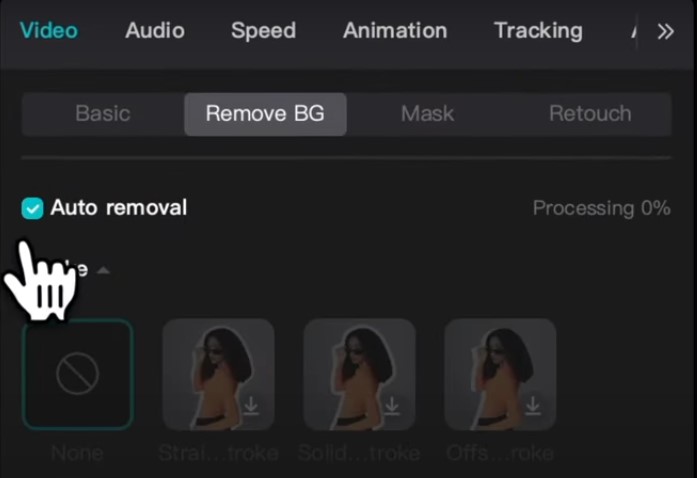
To erase the background, you have to click on the image in the timeline first. After that, select “Remove Background” in the editing tools. With CapCut’s artificial intelligence (AI), the background is automatically erased.
Add a New Background (Optional):
In case you would like to include a different background, follow these steps: click on “Overlay,” then select either another picture or color. After that make sure to adjust its position/scale so that everything looks natural before saving any changes made on this picture if needed!

For Videos
Import Your Video:
Open up a fresh project using CapCut and pick any clip of your choice from the device ensuring good lighting conditions for optimal performance.
Remove the Background:
Delete any unwanted backgrounds by clicking on the timeline video, then choosing “remove background” option on the tool menu; the AI will remove the background instantly.
Replace the Background:
After removing the background use overlay icon then add new surrounding. With this selection, pick any photo or video from gallery and make proper adjustments if necessary to ensure sleek appearance.
Tutorial
Second Method
Removing Background with Chroma Key:
- To begin, create a new project and upload the picture in the CapCut app.
- Select the picture so that you can see options for editing.
- Among the options provided click on the Chroma key icon.
- Indicate the color that should be deleted from the background.
- Adjust the edges using feather and shadow tools to make them look natural and smooth.
- When editing is complete, save the image to your device.
Alternative Tools for Background Removal
There are other options for people who do not like CapCut and they have a number of features that may be appealing to different users with regard to ease of usage, pricing, as well as advanced functionalities like background removal. Below is a summary of some of the best alternatives compiled from different studies done across several platforms:
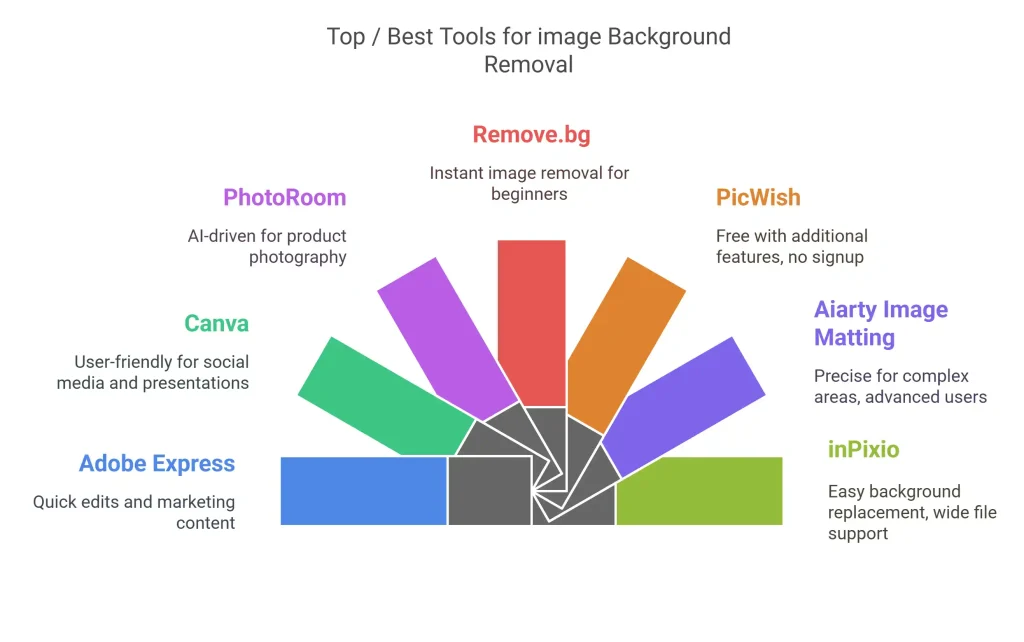
10 best Tools for image Background Removal:
Some other software you can use instead of CapCut with different unique functions for replacing backgrounds are as follows:
Adobe Express
This is a free online image background editor which is part and parcel of the great Adobe ecosystem.
Canva
It has two versions; free and pro, making it easy to remove picture backdrops even in the free version; also, it is very friendly for social media use .
PhotoRoom
It comes as an app or web and has an artificial intelligence ideal for taking photos of products.
Remove. bg
Get rid of the backgrounds easily with this free tool that you can find on the internet without any problems.
PicWish
No registration is needed for this type of photo editing tool that is free and has other options too available online.
Aiarty Image Matting
You can download this AI-based tool which is great at eliminating even the most complex hair-covered areas.
inPixio
Background replacement is possible with this one too, while being user-friendly and offering various features at no cost.
Erase. bg
It is just like Remove. bg software although more advanced and complex for any user.
Photoshop
The professionals will surely make the most of this; however, they may need some time to gain better level of expertise in using its advanced features like Magic Wand or Pen Tool for accurate editing purposes.
Movavi Photo Editor
A desktop application that removes background and has extra tools for editing images.
Top Tools for Video Background Removal:
Below is a list of the most effective video background removal software that have their unique capabilities:
PowerDirector
This makes use of AI that assists in the elimination of background through just a touch in addition to supporting green screen keying.
Fotor
An artificial intelligence based free online software that deletes background without requiring a green screen.
Unscreen
Comes with a background removal feature that is automatic for both free and paid plans, including those in Adobe plugins.
Adobe Premiere Pro
It provides professional tools such as Ultra Key that help in removing backgrounds accurately at an advanced level of editing.
DaVinci Resolve
It is equipped with chroma keying, artificial intelligence-driven magic mask for sophisticated post-production.
Choosing the Right Tool
If you want to do some fast and free editing, you can use Fotor or Media. io. Adobe Premiere Pro or DaVinci Resolve would be great for those who require something more accurate and are able to pay for it. In choosing a tool, think about your platform, budget, and editing skills.
Advanced Techniques for making Background more stunning
Animation effects:
Employ keyframes to create movement of the subject in order to make the videos more dynamic. Associating such motion with shifts in background results into stunning effects.
Color grading:
Change the brightness, contrast or use LUTs. By doing this you will be able to improve on the mood in your pictures and videos. It works perfectly with plain backgrounds.
Blur effects:
To create depth, blur out the background and make your subject stand out. Try using various blur effect strengths. Read more about Blur effects.
Key Considerations for Effective Background Removal
To get the best results in selecting a technique or tool, take into account the factors listed below:
Image/Video Quality:
The most suitable media for AI tools is that which is clear, has high contrast and has been well lit. In tools such as Photoshop, use of images with high resolution ensures a greater level of accuracy with the various methods applied manually.
Batch Processing Needs:
In ecommerce or high-volume projects, PhotoRoom and Remove. bg are good tools for batch processing. They can save time in a similar way that Shopify does.
Customization Options:
There are many options in most tools for customizing the replacement of eliminated background; such as solid colors, transparency, new images all of which help in enhancing creativities e. g. Canva, Movavi.
Skill Level:
For starters, it would be wiser to use AI introductory tools like Adobe Express or Remove. bg, but experienced ones may take their chances with manual control in Photoshop and related software.
Cost:
Users who are concerned about their budgets should go for free options such as PicWish and Erase. bg while Photoshop may need you to purchase a subscription plan according to Windows Report.
Common Issues and Solutions
1. Background not eliminated well:
Poor lighting or low contrast may be problematic. Before you edit increase the brightness as well as contrast of the image. To get better results, use chroma key.
2. Whole picture deleted:
Complex backgrounds may give the AI a hard time. Make sure that the subject is clearly visible. In certain cases, some manual adjustments may be useful.
3. Rough edges:
In case the edges seem jagged, increase the “Feather” setting. After that check for artifacts and polish them. Good lighting will also minimize edge problems.
4. Failure of AI detection:
It works most effectively when applied to human beings and animals. In the case of non-living things, ensure a very high level of contrast. Test under varying light conditions if necessary.
Conclusion
The background removal feature of CapCut has changed the way people create. It is simple to use and provides unlimited options for being creative. Go through the following steps, use some advice, and don’t be afraid to try out different things while making an amazing post on TikTok.

